
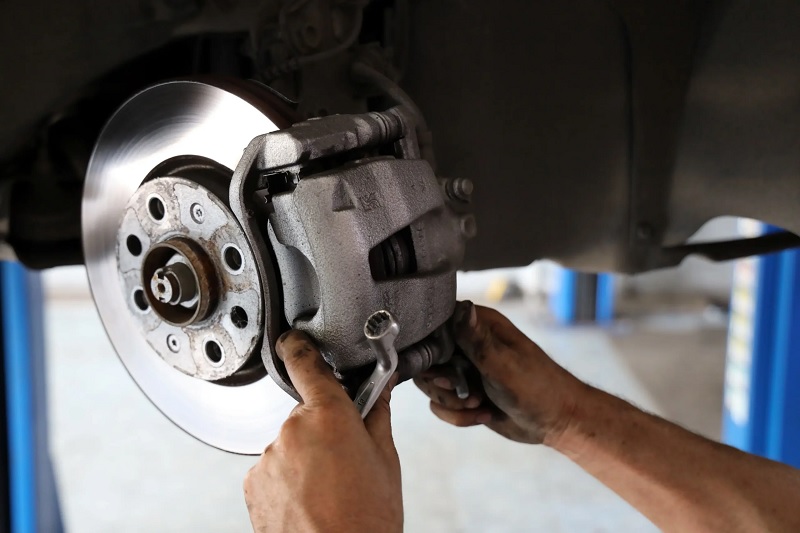

Replacing your vehicle brake pads and rotors is a deeply satisfying maintenance milestone. Whether you tackled the job in your home garage on a Saturday afternoon or picked up the keys from a professional service center, the immediate result is usually a firm pedal and renewed stopping confidence. However, bolting brand-new friction components onto your car does not mean the job is entirely finished. Treating those fresh brakes with a casual attitude right out of the driveway is a recipe for premature wear, annoying squeals, and a dangerous condition known as brake glazing.
Fresh brake pads and rotors require a precise, controlled conditioning phase known as bedding-in or breaking-in. This thermal cycling process transfers an microscopic layer of friction material from the pad compound onto the freshly machined surface of the iron rotor. Skipping this crucial step leaves your braking system vulnerable to uneven heat distribution, localized hot spots, and crystallized pad surfaces that drastically reduce stopping power. Understanding the science behind friction transfer and executing a proper bed-in procedure ensures optimal stopping performance, maximum component lifespan, and a quiet, chatter-free ride.
The Chemistry of Braking: Why Friction Transfer Matters
To understand why a break-in period is mandatory, you have to look at what happens at the microscopic level when a brake pad clamps down onto a rotor. Brakes do not stop a vehicle simply by pressing two solid surfaces together through sheer mechanical force. Instead, they operate through a complex tribological process that converts kinetic energy into thermal energy through friction.
When you install new brake pads and rotors, both surfaces appear smooth to the naked eye, but under a microscope, they are covered in microscopic peaks and valleys. During the initial bedding process, controlled heat and pressure cause the organic, semi-metallic, or ceramic resins within the brake pad to vaporize slightly and transfer a thin, uniform film of friction material onto the porous iron face of the rotor. This is often referred to as the transfer layer.
Once this layer is established, the brakes stop relying entirely on abrasive friction between raw metal and raw pad material. Instead, the brakes stop via adhesive friction—pad material rubbing against pad material adhered to the rotor. If you skip this process and immediately subject brand-new brakes to heavy, high-speed panic stops, the uneven heat buildup causes the resins in the pads to overheat instantly, melting and hardening into a glassy, smooth layer. This phenomenon is known as glazing, and once a pad or rotor is glazed, its coefficient of friction plummets, resulting in a terrifyingly spongy pedal and weak stopping power.
Preparing for the Bed-In Procedure
Before you even think about executing a brake bedding sequence, you must ensure that your installation work was executed flawlessly and that the vehicle is physically prepared for the process.
Cleaning and Surface Preparation
During the installation process, rotors are heavily coated in anti-corrosive shipping oils and manufacturing residues that must be completely removed. Before mounting the rotors, scrub them thoroughly with specialized brake cleaner and a clean shop rag until every trace of oil is gone. If you leave manufacturing residue on the rotor surface, the heat of the bed-in process will bake that oil permanently into the iron pores, destroying the new pads instantly. Similarly, ensure that your hands are clean and that no grease from wheel bearings or tools has transferred onto the friction surface of the brake pads.
Choosing the Right Location
You cannot properly bed in brakes in stop-and-go city traffic. The procedure requires a stretch of empty, straight road where you can safely accelerate up to moderate speeds and bring the vehicle down to a controlled crawl without interrupting traffic or violating speed limits. An empty industrial park road on a weekend morning or a quiet rural highway is the ideal setting. Safety is paramount; always check your rearview mirrors before initiating any heavy braking sequence.
Step-by-Step Brake Bedding Procedure
The art of bedding in brakes is all about controlled thermal management. You want to heat the brakes up progressively and cool them down completely without ever coming to a complete, stationary stop while the components are scorching hot.
Phase One: Gentle Warm-Up
Begin your drive by operating the vehicle normally for about five to ten minutes, executing five to six moderate stops from roughly thirty miles per hour down to ten miles per hour. Press the brake pedal with about forty to fifty percent of your total effort. This initial warm-up brings the entire brake assembly—calipers, fluid, pads, and rotors—up to operating temperature gradually, preventing thermal shock that can warp brand-new iron rotors.
Phase Two: The Aggressive Heat Cycle
Once the components are warmed up, it is time to initiate the core transfer layer deposition. Accelerate the vehicle smoothly up to approximately forty-five or fifty miles per hour on your chosen stretch of open road. Firmly apply the brakes with about eighty percent of your maximum effort—just short of engaging the anti-lock braking system—to bring the vehicle down to roughly ten miles per hour. Do not come to a complete stop.
Immediately accelerate back up to fifty miles per hour and repeat this heavy deceleration cycle eight to ten times in rapid succession. You will likely begin to smell a distinct, warm, metallic odor or light smoke emanating from the wheel wells; this is completely normal and indicates that the resins are outgassing and the transfer layer is successfully forming.
Phase Three: The Critical Cool-Down Period
After completing your final heavy deceleration, the most important rule of the entire process kicks in: do not come to a complete stop and hold your foot on the brake pedal. If you stop at a red light while your brake rotors are glowing with heat and your pads are fused against them, the hot pads will leave a thick imprint of friction material etched into the iron rotor surface. This uneven deposition causes severe brake pulsation and steering wheel shimmy down the road.
Instead, drive the vehicle continuously at forty to fifty miles per hour for ten to fifteen minutes without touching the brakes if possible. Let the ambient airflow naturally cool the rotors down to normal operating temperatures. If you must stop at a traffic light during this cool-down phase, put the car in park or neutral and release the brake pedal entirely, creeping forward slowly if traffic allows.
Common Symptoms of Improper Bedding
Failing to execute a proper break-in procedure usually makes itself known within the first few hundred miles of driving. Recognizing these symptoms helps you diagnose whether your braking issues stem from installation errors or poor thermal conditioning.
Brake Glazing and Reduced Bite
If your brake pedal feels unusually hard, but the car refuses to slow down with authority unless you stand on the pedal with all your weight, your pads are likely glazed. Glazed pads have a shiny, mirror-like sheen on their friction surfaces. In many cases, you can rescue slightly glazed pads by removing them and lightly sanding the friction surface with medium-grit sandpaper on a flat workbench, followed by a meticulous re-bedding procedure.
Rotor Judder and Vibration
If you feel a rhythmic pulsing through the brake pedal or the steering wheel when slowing down from highway speeds, you are experiencing rotor thickness variation, often incorrectly blamed on warped rotors. This vibration is almost always caused by uneven pad material deposits left on the rotor face because the driver came to a dead stop while the brakes were still scorching hot during the initial drive. Severe judder usually requires having the rotors resurfaced on a brake lathe or replacing them outright if the hot spots have permanently altered the metallurgy of the iron.
Maintaining Long-Term Brake Health
Bedding in your brakes is not a permanent shield against future wear issues. Once your new pads and rotors are properly conditioned, maintaining them requires sensible driving habits. Avoid prolonged, dragging brake applications down long mountain descents; instead, downshift into a lower gear to let engine braking manage your speed. Regularly inspect your brake fluid condition and ensure your caliper slide pins are well-lubricated during tire rotations. Taking these precautions protects your investment and ensures your vehicle stops smoothly, quietly, and reliably every time you step on the pedal.

Comments are closed.